|
||||
|
|
|||
|
||||
|
|
|||
|
Search
Log in
|
APS-7306 DC Programmable Power Supply
Aktakom APS-7306 programmable power supply is designed to power radio technical equipment with stabilized voltage and current in repair process, laboratory research. The present model is perfect for repair services and in scientific and research laboratories. Features:
Specifications:
Standard accessories:
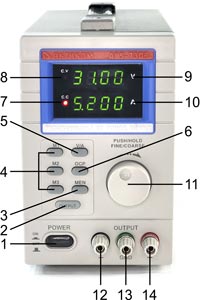
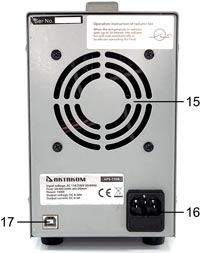
APS-7306 Operation InstructionsDiagrams of panels
Switching the Power Supply On or Off1. Connect the included power cord to the back of the device [16] and plug the other end into a suitable, earthed power socket. Always connect the device to an earthed power socket. 2. Press the Power button [1] to switch the power supply on. At this moment, there is no output voltage or current on the output terminals. 3. Press the Power button [1] to switch the power supply off. Using the Power Supply in Constant Voltage ModeIf you want to use the power supply in constant voltage mode, you set up the desired output voltage between 0V and 30V. You also set up the desired current limit. If the output current exceeds the limit, the power supply automatically goes into constant current mode. Using the Power Supply in Constant Current ModeIf you want to use the power supply in constant current mode: you set up the desired output current between 0A and 3A/5A. You also set up the desired voltage limit. Setting Voltage and CurrentYou can save 3 different voltage/current settings using the memory keys M1~M3.1. 1. Press the Voltage/Current key [5] to set the voltage. The voltage readout flashes. For use in constant voltage mode: this is the desired constant voltage. 2. Turn the adjustment knob [11] until you reach approximately the desired voltage. Press [11] to select a digit in the voltage readout [9] and turn the adjustment knob to fine-tune. 3. Press the Voltage/Current key [5] again to set the current. The current readout flashes. For use in constant voltage mode: this is the desired current limit. For use in constant current mode: this is the desired constant current. If you enable overcurrent protection, the output switches off automatically if the current exceeds this value. 4. Turn the adjustment knob [11] until you reach approximately the desired current. Press [11] to select a digit in the current readout [10] and turn the adjustment knob to fine-tune. 5. Press the memory key [3] again (or wait until the display to start flashing). Then press the m1-m3 button The settings are saved in the selected memory (the display stops flashing) Recalling SettingsTo recall one of the saved settings, press the corresponding memory key M1~M3 [4]. The corresponding voltage/current settings appear on the display. Note: the output is switched off automatically when you press a memory key to recall a setup. Connecting a Load1. Connect the loads positive terminal to the red + terminal [14] of the power supply. 2. Connect the loads negative terminal to the black terminal [12] of the power supply. 3. You can connect the "+" or "" terminal to the green earth terminal [13] of the power supply to pin the voltage to 0V (earth potential) at that terminal. If you leave the earth terminal unconnected, the output floats with respect to the ground. Applying Voltage to the Load1. Press the Off/On key [1] to apply the voltage to the load. The OUT [2] and C.V. indicators [8] light. The power supply works in constant voltage (CV) mode; the display now shows the actual output voltage and current. If the current exceeds the set current limit, the power supply automatically goes into constant current (CC) mode. The C.V. indicator goes out and the C.C. indicator [7] lights. 2. Press the Off/On key [1] to switch the output off. Using Overcurrent Protection1. To protect against overcurrent, set up the maximum current and then press the button. 2. Press Off/On to apply the output to the load. If the output current becomes higher than the set value, the power supply cuts off the output and the OCP indicator flashes. 3. Disconnect the load. To recover, press the OCP key. Frequently Asked Questions
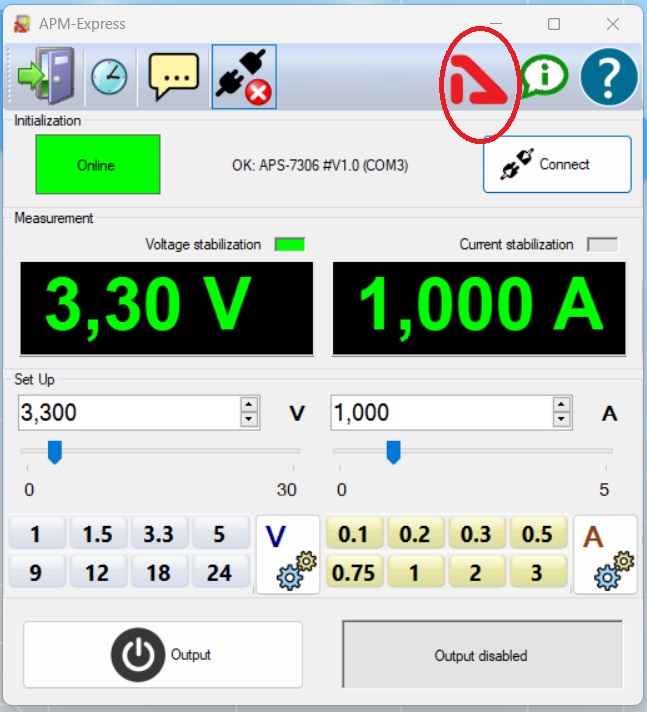
Compatible Software
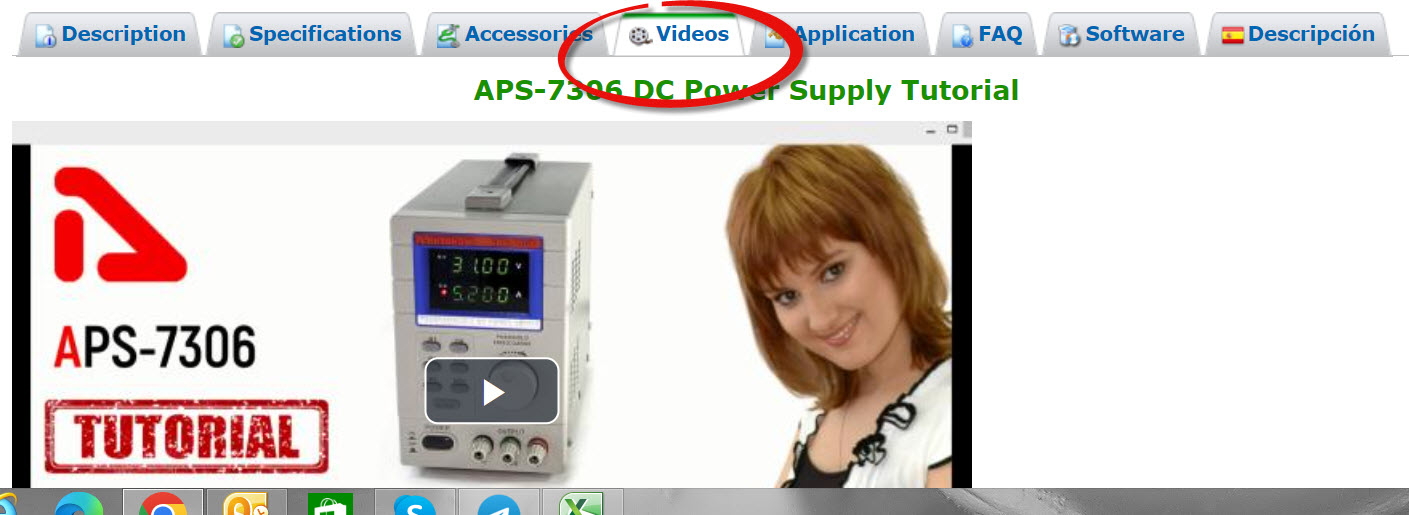
Troubleshooting LED Stip Using a Power Supply with Voice Guide SoftwareLED Repair Tutorial Part 5Fixing LED Light Fixture Part 3: Unforeseen causes of broken LED lightsHow to fix LED light fixture using AKTAKOM AM-1060 DMM, ASE-1209 Soldering Tweezers and APS-7306 Power SupplyAPS-7306 Connecting the Power SupplyAPS-7306 DC Power Supply TutorialAKTAKOM APS-7306 DC Power Supply PromoBack to the section |
|||||||||||||||||||||||||||||||||||||||||||||||||||