Search
Log in
Login:
Password:
Register
Forgot your password?

ACM-2348 Clamp Meter

DC Current 1000A ±(1.8%+5digits); AC Current 1000A ±(2.0%+5digits); DC Voltage Max Range: 600V ±(2.0%+3digits); AC Voltage Max Range: 600V ±(2.5%+5digits); Resistance Max Range: 40.00MΩ ± (3.5%+5digits); Frequency Max Range: 100.0kHz ±(1.2%reading+2digits) Sensitivity: 10Vrms min; Duty Cycle 0.5 to 99.0% ±(1.2%reading+2digits)

Manuals: 
User's Manual (473.69 Kb)

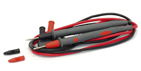
AKTAKOM ACM-2348 is a True RMS Clamp Meter with Wattmeter.

Features

1. Double molded housing
2. True RMS AC Voltage and Current
3. DC and AC True Power to 240Kw
4. 1.2” (30mm) Clamp Digital display
5. Electronic overload protection
6. Auto Power Off and Low battery indication
7. Data Hold function
8. DCA Zero function

Data Hold Button

To freeze the LCD meter reading, press the data hold button. The data hold button is located on the left side of the meter (top button). While data hold is active, the HOLD display icon appears on the LCD. Press the data hold button again to return to normal operation.
Note: The HOLD feature will be activated when the backlight is turned on. Press the HOLD key again to exit Hold.

Backlight Button

The backlight function illuminates the display and is used when the ambient light is too low to permit viewing of the displayed readings. Press the button for the second time to turn the backlight on and press the button a second time to turn the backlight off.

Manual Ranging

The meter turns on in the autoranging mode. Press the RANGE button to go to manual ranging. Each press of the range button will step to the next range as indicated by the unitsand decimal point location. Press and hold the RANGE button for two seconds to return toautoranging. Manual ranging does not function in the AC/DC Current, Watt, Diode and Continuity check functions.

Specifications

Function Range & Resolution Accuracy (% of reading)
DC Current 1000 ADC ± (1.8 % + 5 digits)
AC Current 1000 AAC ± (2.0 % + 5 digits)
DC Voltage 400.0 mVDC ± (0.8% + 3 digits)
4.000 VDC ± (1.5% + 3 digits)
40.00 VDC
400.0 VDC
600 VDC ± (2.0% + 3 digits)
AC Voltage 400.0 mVAC ± (0.8% + 20 digits)
4.000 VAC ± (1.8% + 5 digits)
40.00 VAC
400.0 VAC
600 VAC ± (2.5% + 5 digits)
Resistance 400.0 Ω ± (1.0% + 4 digits)
4.000KΩ ± (1.5% + 2 digits)
40.00KΩ
400.0KΩ
4.000MΩ ± (2.5% + 3 digits)
40.00MΩ ± (3.5% + 5 digits)
Frequency 5.000Hz ±(1.5% reading + 5 digits)
50.00Hz ±(1.2% reading + 2 digits) Sensitivity: 10Vrms min.
500.0Hz
5.000kHz
50.00kHz
100.0kHz
Duty Cycle 0.5 to 99.0% ±(1.2% reading + 2 digits)
Pulse width: 100µs - 100ms, Frequency: 5.000Hz ~ 100.0kHz
AC WATT (0-250V,0-400A,50/60Hz TRMS) 40KW ±(2.5% + 5 digits)
AC WATT(0-600V,0-400A, 50/60Hz TRMS) 240KW ±(2.5% + 5 digits)
DC WATT 0-250V,0-400A) 40KW ±(2.0% + 5 digits)
DC WATT (0-250V,0-400A) 240KW ±(2.0% + 5 digits)

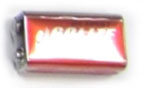
Note:No Autoranging & 400mV AC Voltage Range
Diode Test Test current of 0.3mA typical; Open circuit voltage 1.5V DC typical.
Continuity Check Threshold <100W; Test current < 1mA
Size(HxWxD): 9in × 3,2in × 2in / 229mm × 80mm × 49mm
Weight: 10,7oz / 303g

Accessories

1. 9V battery


2. Test leads


3. User manual


4. Gift box with carrying case

DC+AC Power/Watt Measurement

  1. Connect the test leads to the voltage source in parallel with the load
  2. Clamp on one of the wire to the load
  3. Select the range to Voltage AC or DC and check the voltage reading
  4. Select the range to Current AC or DC and check the current reading
  5. Select appropriate Watt range 40kW (0-250V, 0-400A) or 240kW (0-600V, 0-400A)
  6. Read the value shown on LCD in KW (AC+DC).

Power Measurement

DC/AC Current Measurement

  1. Ensure that the test leads are disconnected from the meter before making current clamp measurements
  2. Select AC or DC with the MODE button.

AC Current Measurement

DC/AC Voltage Measurement

  1. Insert the black test lead into the negative COM terminal and the red test lead into the positive V terminal
  2. Set the function switch to the V position
  3. Select AC or DC with the MODE button
  4. Connect the test leads in parallel to the circuit under test
  5. Read the voltage measurement on the LCD display.

DC Voltage MeasurementAC Voltage Measurement

Diode Measurements

  1. Insert the black test lead banana plug into the negative COM jack and the red test lead banana plug into the positive diode jack.
  2. Turn the rotary switch to the position.
  3. Press the MODE button until "" appears in the display.
  4. Touch the test probes to the diode under test. Forward voltage will indicate 0.4V to 0.7V. Reverse voltage will indicate "OL". Shorted devices will indicate near 0mV and an open device will indicate "OL" in both polarities.

Test Diode

Frequency or % duty cycle measurements

  1. Set the function switch to the V position.
  2. Insert the black lead banana plug into the negative COM jack and the red test lead banana plug into the positive V jack.
  3. Select Hz or % duty with the Hz/% button.
  4. Touch the test probe tips to the circuit under test.
  5. Read the frequency on the display.

Frequency MeasurementDuty Cycle Measurement

Resistance and Continuity Measurements

  1. Insert the black test lead into the negative COM terminal and the red test lead into the positive terminal.
  2. Set the function switch to the Ω position.
  3. Use the multifunction MODE button to select resistance.
  4. Touch the test probe tips across the circuit or component under test. It is best to disconnect one side of the device under test so the rest of the circuit will not interfere with the resistance reading.
  5. For Resistance tests, read the resistance on the LCD display.
  6. For Continuity tests, if the resistance is < 100Ω, a tone will sound.

Continuity CheckResistance Measurement


Back to the section
AKTAKOM AMM-4189 Digital Multimeter & Oscilloscope