|
|
ATE-1509 Light Meter
|
|
Data Logger Max Range: 400,000lux; Accuracy: ±5%±10d (<10,000lux), ±10%±10d (>10,000lux); Max Resolution: 0.1lux/0.01Fc; Measuring rate: 1.5 times/second; Photo Detector: 4.5×2.4×1.1in/115×60×27mm
Manuals:
|
|
AKTAKOM ATE-1509 light meter provides accurate display light level in terms of Foot Candles (FC) or LUX over wide range. Just turn the Function Switch to select the "lux" scale and set the range to desired one, then remove the photo detector to light source in a horizontal position and reading the illuminance norminal from the LCD display. When the measurement is completed replace the photo detector from the light source.
Features
- LCD display counts: 4000
- Auto Ranging
- Analog bargraph/segments: 41-segments
- Peak Hold
- Relative mode
- Max and Data Hold
- Auto Power Off
- Low battery indication
- User selectable FC/Lux
- Output: USB
- Capacity for data logging 99
- Total accuracy: for C.I.E standard illuminate A(2856K)
Specifications
Max Range: 400,000 Lux
Accuracy: ±5%±10d (<10,000Lux), ±10%±10d (>10,000Lux)
Max Resolution: 0.1 Lux/0.01 Fc
Measuring rate: 1.5 times/second
Photo Detector: 4,5in × 2,4in × 1,1in / 115mm × 60mm × 27mm
Size(H×W×D): 8in × 3in × 2in / 203mm × 75mm × 50mm
Weight: 9,8oz / 280g
Accessories
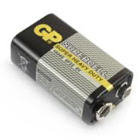
1. 9V battery
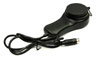
2. Photo Detector
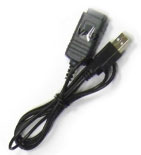
3. USB cable
4. Software

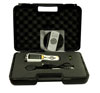
5. Carrying case and Gift box
| ATE-1509 Light Meter - side view |
|
|
| ATE-1509 Light Meter - top view |
|
|
| ATE-1509 Light Meter - with accessories |
|
|
|
| ATE-1509 Light Meter - carrying case |
|
|
| ATE-1509 Light Meter - probe |
|
|
| ATE-1509 Light Meter - rear view |
|
|
|
Operation instructions
- Power-up: Press the power key to turn the meter ON or OFF
- Selecting the Lux or FC scale: Set the range selection switch to desired Lux or FC range
- Remove the photo detector cap and face it light source in a horizontal position
- Press the REC/SET key and RANGE/APO key, Enable the AUTO power off or Disable this function
- Read the illuminance nominal from the LCD display
- Over range: If the instrument only displays “OL”, the input signal is too strong, and a higher range should be selected. The range will show on the down of the LCD, LUX: 400 -> 4k -> 40k -> 400k; FC: 40 -> 400 -> 4k -> 40k
- Data-Hold mode: Press the hold key to select Data-Hold mode. When HOLD mode is selected, the illuminance meter stops all further measurements. Press the HOLD key again to exit Data-Hold mode. Then it resumes normal operation
- Peak-Hold mode: Press the PEAK key to choose Pmax or Pmin recorder mode, and expose the photo detector to light pulse measuring field. Press the PEAK key again to exit PEAK recorder mode, then the meter will resume normal operation
- Maximum and Minimum mode: Press MAX/MIN key to choose the Maximum (MAX) reading, Minimum (MIN) reading and current reading (MAX/MIN blink) recorder mode. Press MAX/MIN key again to exit this mode.
- Relative reading mode: Press REL key to enter Relative mode. The display shown zero value and the current reading will be stored as a zero-in value. Press again to exit this mode
- USB mode: connect the PC with USB
- Back-light function: Press the Backlight key to turn on. Press again to turn off
- When the measurement is completed, replace the photo detector cap and turn the meter off
- Setup time and sampling rate: Press the MEM/SETUP and UNITS key start to setup the time and sampling. The first setup target is The hour. Press key PEAK or REL to choose the object of the setting. Press REL key to choose object to repeat as below process: Hour -> minute -> second -> sampling -> month -> day -> week -> year -> hour …
. Press PEAK key to choose the object and repeat as below process: Hour -> year -> week -> day -> month -> sampling -> second -> minute -> hour -> year
. Press MAX/MIN key to add object of setting. Press HOLD key to reduce the object of seting. Hold key of MEM/SETUP and UNITS to exit the setting time and sampling mode, and then confirm.
- MEM function: Press key of MEM/SET to save the present data HOLD key of LOAD 5s start to load the records. Press key of MAX/MIN to add the number of records. Press key of HOLD to reduce the number of records. After you do that you must hold the key of LOAD 5s to resume normal operation
- DATALOGGER function: SETUP the time and sampling rate first, the default sampling rate is 1s. Hold the key of MEM/SETUP 5s, start the datalogger function, the MEM on the screen will be bicker. If the memory IC is full, the memory number will show ‘OL’. Press the key of MEM/SETUP 5s , stop the datalogger function, then the meter will resume normal operation. Then the datalogger number will return to 1, you could start your records again.
- HOLD the key of MEM/SETUP and LOAD 5s to clear the 99 memory.
Back to the section
|
|


