|
||||
|
|
|||
|
||||
|
|
|||
|
Search
Log in
|
ASE-1206 Powerful Induction Soldering Station
AKTAKOM ASE-1206 Soldering station for non lead soldering. Advantages
Specifications
Safety instructionsTake care of yourself!
Parameters SettingThe station has the following working parameters. If you want to set parameters, you must input right password. Setting parameters as follows: Password SettingThe initial password in station’s memory is «000». The setting temperature is admitted in this status. If need to restrict the setting temperature, the password must be changed and turn off the unit, then turn on.
A. Enter into password setting:1. Turn off the power switch, Press and hold the «▲» and «▼» buttons simultaneously, then turn on the power switch.
2. Continue holding down the «▲» and «▼» buttons until the display shows
3. When the LCD shows B. Input previous password:
Press the «*» button, the LCD shows After selecting the password of three digit, press the «*» button. C. The input password is error:If the station enters into normal work state after display window shows the current setting temperature for two seconds, this indicates the input password is error, and the temperature setting can’t be done. D. The input password is correct:
If the display window E. Input new password:
When display window is showing F. Repeat the new password:
When three digits are selected, press «*» button, the display window shows Note: The word of password is 0 to 9, ten figures. If not, the inputting password is invalid. Setting and Operating the Soldering StationIron Holder and Sponge
Note: If the sponge becomes dry during working, add appropriate water. Connection
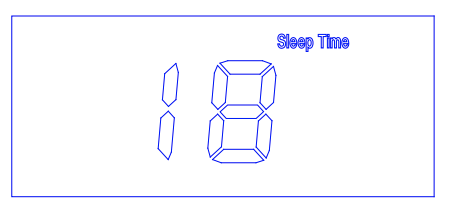
Setting the temperatureTemperature risingDon’t press «*» knob, and press «▲» knob directly. If so, the setting temperature will raise 1°C and the display window will display the set temperature. When loosen the «▲» knob, the display window will delay to display the set temperature about 2 seconds. If within 2 seconds, press the «▲» knob again, the setting temperature will raise 1°C again. If press the «▲» knob and not loosen at least 1 second, the setting temperature will rise rapidly. Till the needed temperature reaches, then loose the «▲» knob. Temperature droppingDon’t press «*» knob, and press «▼» knob directly. If so, the setting temperature will drop 1°C and the display window will display the set temperature. When loose the «▼» knob, the display window will delay to display the set temperature about 2s. If 2 seconds later, press the «▼» knob again, the setting temperature will drop 1°C again. If press the «▼» knob and not loose at least 1 second, the setting temperature will drop rapidly. Till the needed temperature reaches, then loose the «▼» knob. Sleep Time Setting1. When not operating the station during a certain period of time (the sleep time is more than 00), station will come into sleep state. When the station is in sleep mode, the tip temperature will decrease to 200°C (if the set temperature is more than or equal to 200°C) or 50°C (if the set temperature is less than 200°C) and remain the temperature until resuming the station. To resume soldering, there are several ways as follows:
2. After pressing «*» button to store the set parameter, LCD display «sleep time». This indicates that the station comes into sleep time setting mode. Press «▲» and «▼» button to select the desired value and press «*» button to select the digit bit. After setting, press «*» button to store it. Method of setting value is the same as «Input calibration temperature».
Note:
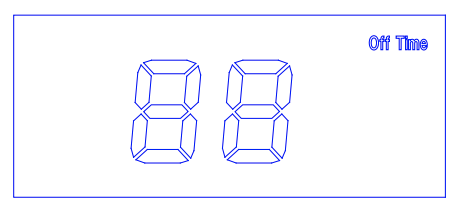
Switching-off Time Setting1. If the station isn’t resumed in the set time after it comes into sleep state, the power supply will be shut off automatically, and the LCD will not show anything, the station stop working. Turn on power switch to resume working. 2. After pressing «*» button to store the sleeping time, LCD display «off time». This indicates that the station comes into auto switching off time setting mode. Press «▲» and «▼» button to select the desired value and press «*» button to select the digit bit. After setting, press “*” button to store it. Method of setting value is the same as “Input calibration temperature”.
Note:
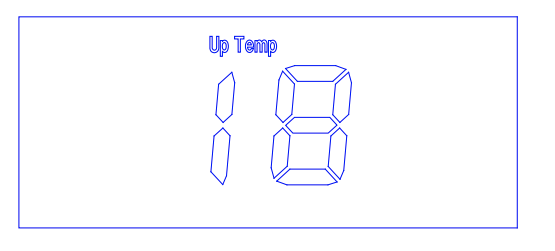
Up and Down Limited Temperature Setting1. The station can set upper and bottom limit of temperature value, when tip’s temperature is out of this range, the station can give an alarm (Need to set a working mode with alarm function). 2. After pressing «*» button to store the set working mode, LCD display «up temp», this indicates that the station enter into up temperature setting mode. Press «▲» and «▼» buttons to select the desired value and press «*» button to select the digit bit. After setting, press «*» button to store it. Method of setting value is the same as «Input calibration temperature».
3. When LCD display «down temp», this indicates that the station comes into down temperature setting mode. Press «▲» and «▼» button to select the desired value and press «*» button to select the digit bit. After setting, press «*» button to store it. Method of setting value is the same as «Input calibration temperature».
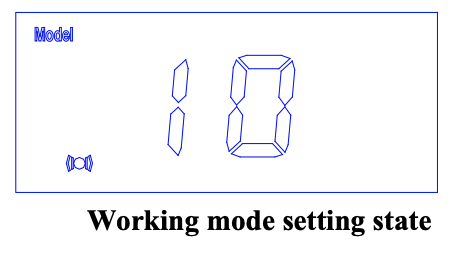
Working Mode Setting
1. When the display window shows → 00 ↔ 01 ↔ 02 ↔ 03 ↔ 04 ↔ 05 ← → 10 ↔ 11 ↔ 12 ↔ 13 ↔ 14 ↔ 15 ←
When 10 to 15 are shown among the above values, LCD will display
2. After selecting the working mode, press «*» button. The working mode is stored into the internal memory. Please refer to the «Working Mode Table» for the meaning of the digit displayed. Note: «X» represents the original working mode digit. Working Modes:
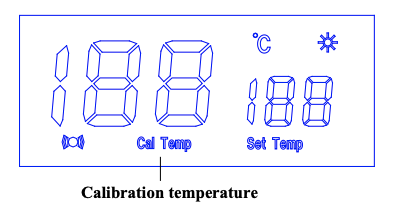
Calibrating the temperatureThe soldering iron should be recalibrated after changing the iron, or replacing the heating element or tip. The unit adopts digital calibration mode and the revision value is inputted by pressing button, make the adjustment easily. Method of recalibrating temperature: use the thermometer to calibrate it, and it is precise comparatively. Calibrate by using thermometer1. Set the unit’s temperature to a certain value. 2. When the temperature stabilizes, measure the tip’s temperature with thermometer and write down the reading. Press «*» button not loose and press the «▲» and «▼» button simultaneously, the soldering station enters into calibrating temperature mode and LCD display «Cal Temp».
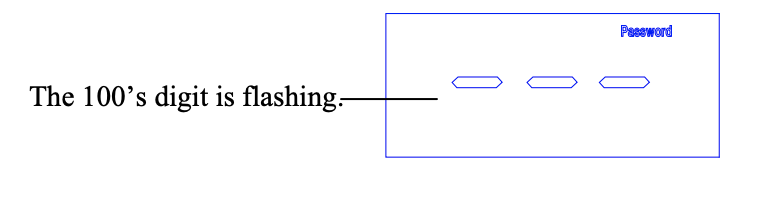
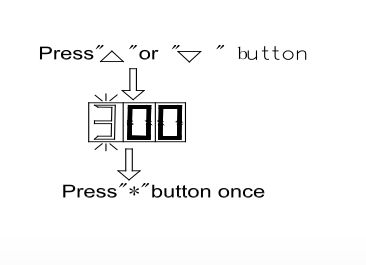
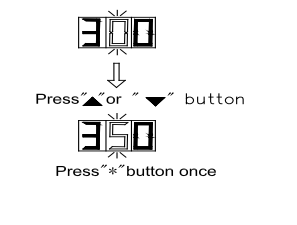
3. At the moment, the 100’s digit in the screen is flashing. Press the «▲» and «▼» button to select the value. The value you select is 100’s digit of the reading and after selecting, press «*» button. 4. Now, the tens digit in the screen is flashing. Press the «▲» and «▼» button to select the value. The value you select is tens digit of the reading and after selecting, press «*» button. 5. Now, the 1’s digit in the screen is flashing. Press the «▲» and «▼» button to select the value. The value you select is 1’s digit of the reading and after selecting, press «*» button. Here, the whole calibration operation has been finished. 6. If the temperature still has departure, you can repeat calibration in accordance with the above steps. 7. When inputting calibration temperature, if the value of calibration temperature is error and the station have protection function that is after inputting the calibration temperature and press «*» button, the 100’s digit of display temperature will flash. Here, please re-input the value. Suggest test the tip’s temperature with 191/192 thermometerIf the soldering station is locked by password, it will not be able to calibrate the tip temperature and you must input the right password. For example: When the displaying temperature is 400°C, input the calibration temperature 350°C.1. Press «*» button not to loosen and press the «▲» and «▼» buttons simultaneously, the soldering station enters into calibrating temperature mode. Here, the hundreds digit in LCD is flashing. This indicates that the station is in temperature calibrating mode and that the hundreds-digit can be adjusted. 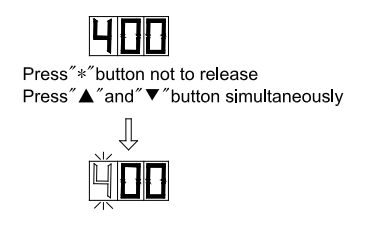 2. Select the desired value for 100’s digit. Use the «▲» and «▼» button to change displayed value as follows. →1 ↔ 2 ↔ 3 ↔ 4 ↔ 5 ← Press the «*» button when the desired value is displayed. This will cause the middle digit (the tens digit) in the display to begin flashing.
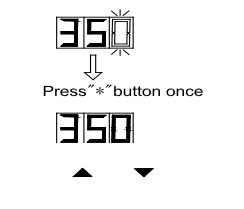
3. Select the desired value for the tens digit. Use the «▲» and «▼» button to change displayed value as follows. → 1 ↔ 2 ↔ 3 ↔ 4 ↔ 5 ↔ 6 ↔ 7 ↔ 8 ↔ 9 ↔ 0 ← Press the «*» button when the desired value is displayed. Here, the right digit (the one digit) will begin flashing to indicate that the one digit can be set.
4. Select the desired value for the 1’s digit. Use the «▲» and «▼» button to change displayed value as shown above for the tens place selection. Press the «*» button. Here, pressing the «*» button to enters the setting temperature into the internal memory.
Frequently Asked Questions
Back to the section |