Measurement procedure
DC voltage measurement
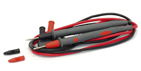
- Insert the black and red test leads into the COM and VΩHz
 input terminals respectively.
- Set rotary switch at desired V= position. Connect the test lead tips in parallel with the circuit to be measured. Be careful not to touch any electrical conductors. The polarity of the red lead connection will be indicated along with the voltage value.
- Read the measure result from the display.
AC voltage measurement
- Insert the black and red test leads into the COM and VΩHz input terminals respectively.
- Set rotary switch at desired V~ position. Connect the test lead tips in parallel with the circuit to be measured. Be careful not to touch any electrical conductors.
- Read the measure result from the display.
- When measuring AC voltage, pushing Hz/DUTY button, the frequency of ACV will show on LCD display.
DC current measurement
- Set the rotary switch at desired 400A or 1000A position.
- Push the FUNC. button to select DC current.
- Push the “ZERO” button to get relative measurement mode and “0000” show on LCD display.
- Press the trigger to open transformer jaw and to clamp one conductor only, making sure that the jaw is firmly closed around the conductor.
- Read current value on LCD display.
NOTE: As the jaw core may remain some magnetic force after using for awhile. If the display can not reach “0”, open the jaws several times. Then work again.
AC current measurement
- Set the rotary switch at desired 400A or 1000A position.
- Push the FUNC. button to select AC current.
- Press the trigger to open transformer jaw and to clamp one conductor only, making sure that the jaw is firmly closed around the conductor.
- Read current value on LCD display.
Resistance measurement
- Insert the black and red test leads into the COM and VΩHz input terminals respectively.
- Set rotary switch at desired Ω

 range position.
- Push FUNC. button to select Ω.
- If the resistance being measured exceeds the maximum value of the range or the input is not connected, an overrange indication “OL” will be display.
- Read the measure result directly from LCD display.
NOTE: When checking in-circuit resistance, be sure the circuit under test has all power removed and that all capacitors have been discharged fully.
Continuity testing
- Insert the black and red test leads into the COM and VΩHz input terminals respectively.
- Set rotary switch at desired Ω range position. Push FUNC. button to select .
- If continuity exists (i.e., resistance less than 30Ω) built - in buzzer will sound.
Diode measurement
- Insert the black and red test leads into the COM and VΩHz input terminals respectively.
- Set rotary switch at desired Ω range position. Push FUNC. button to select
- The red lead should be connected to the anode and the black lead to the cathode of the diode.
- The typical voltage drop should be about 0.6V for silicon diode or 0.3V for germanium diode.
- If the diode is reverse biased or there is an open circuit the reading displayed will be “OL”.
Capacitance measurement
- Insert the black and red test leads into the COM and VΩHz input terminals respectively.
- Set rotary switch at desired Ω range position. Push FUNC. button to select .
- Connect test leads across the capacitor under measurement and be sure that the polarity of connection is observed (Note: The polarity of the red lead connection is positive “+”).
- Read the measure result directly from the display.
Measuring frequency
- Insert the black and red test leads into the COM and VΩHz input terminals respectively.
- Set rotary switch at desired Hz position, Push Hz/Duty button to select frequency mode and connect the test lead tips in parallel with the circuit to be measured. Be careful not to touch any electrical conductors.
- The signal amplitude must also be greater than the sensitivity level.
- Determine that the amplitude level of the signal to be measured is not greater than the input voltage limit (25V DC/AC rms.).
- Read the measure result directly from LCD display.
NOTE: The input voltage should be between 1V and 10V rms. ac. If the voltage is more than 10V rms. Reading may be out of the accuracy range.
Measuring frequency for clamp
- Set the rotary switch to "Hz" position.
- Press the trigger to open transformer jaw and to clamp one conductor only, making sure that the jaw is firmly closed around the conductor.
- Read the measure result of frequency of AC current flowing through the transformer jaw from the display.
NOTE: Frequency range: 40Hz to 400Hz (>20A).
Measuring temperature
- Set the rotary switch at °C Position. The LCD display will show “OL”.
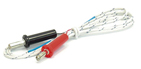
- Connect the red lead of “K” type thermocouple into the VΩHz jack and the black lead of “K” type thermocouple into the “COM” jack. The LCD display will show the current environment temperature.
- Contacting the object be measured with the thermocouple probe.
- Read temperature value on the LCD display.
Duty cycle test
- Insert the black and red test leads into the COM VΩHz input terminals respectively.
- Set rotary switch at desired Hz position. Push Hz/Duty button to select % mode and connect the test lead tips in parallel with the circuit to be measured. Be careful not to touch any electrical conductors.
- Read the measure result directly from LCD display.