|
|
AM-1009 Digital Multimeter
AM-1009 Digital Multimeter
|
|
Digital multimeter, 3½ digits LCD (1999), the basic error of 0.5%. Measurement of DC voltage of 1000V ± (1.5%+3); AC voltage of 750V ± (1.5%+3); DC of 20A ± (1.5%+8); AC of 20A ± (1.0%+15), resistance of 200MΩ ± (0.8%+3); capacitance up to 200µF ± (2.5%+20); frequency range of 40...400Hz. Logic TTL test, square signal generator, continuity test, diode test, light indicator of “living” circuit, charge indicator, backlight. Power: 9V. Dimensions: 190x93.5x37mm / 7.5x3.7x1.5in, weight: 426g / 15oz.
Manuals:
|
|
AKTAKOM AM-1009 multimeter is designed for the measurement of DC and AC (40-400Hz), up to 20A! and voltage, resistance, capacitance, for diode test and continuity test.
AM-1009 is a stable and high performance digital multimeter driven by battery. It uses the LCD with 42mm high make the reading is clearly. And the function of 20s back light and overload protection make operation is convenient.
The instrument has the function of measuring DCV, ACV, DCA, ACA, resistance, capacitance, and diode, triode and continuity test. The instrument takes dual-integral A/D converter as key point, is an excellent tools.
Features:
- 3½ digits LCD display, 1999 counts
- Auto polarity indication
- Measuring method: dual slope A/D transfer
- Sampling rate: approx. 3 times/sec
- Logic TTL test
- Square signal generator
- Continuity test
- Diode test
- Light indicator of “living” circuit
- Auto power off function, can be disabled
- Charge indicator
- Backlight
Specifications:
|
Function
|
Range
|
Resolution
|
Accuracy
|
|
DC Voltage
|
0.2V
|
0.1mV
|
±(1.5%+3)
|
|
2V
|
1mV
|
±(1.5%+3)
|
|
20V
|
0.01V
|
±(1.5%+3)
|
|
200V
|
0.1V
|
±(1.5%+3)
|
|
1000V
|
1V
|
±(1.5%+10)
|
Input impedance: 10MΩ
Overload protection: 200mV range: 250VDC or AC peak value, other range:1000VDC or AC peak value
|
Function
|
Range
|
Resolution
|
Accuracy
|
|
AC Voltage
|
2V
|
1mV
|
±(1.5%+3)
|
|
20V
|
10mV
|
±(1.5%+3)
|
|
200V
|
0.1V
|
±(1.5%+3)
|
|
750V
|
1V
|
±(1.5%+3)
|
Input impedance: 10MΩ Max
Overload protection: 1000VDC or AC peak value
Frequency response: lower than 200V range: 40…400Hz,750V range: 40…200Hz
Displaying: rms of sine wave (mean value response)
|
Function
|
Range
|
Resolution
|
Accuracy
|
|
DC Current
|
20mA
|
10μA
|
±(1.5%+10)
|
|
200mA
|
100μA
|
±(1.5%+8)
|
|
20A
|
10mA
|
±(2.0%+5)
|
Max. measuring voltage drop: 200mV
Max. input current: 20A (within 10s)
Overload protection: 0.2A / 250V self-resume fuse, 20A infused
|
Function
|
Range
|
Resolution
|
Accuracy
|
|
AC Current
|
20mA
|
10μA
|
±(1%+15)
|
|
200mA
|
100μA
|
±(2%+5)
|
|
20A
|
10mA
|
±(3%+10)
|
Max. measuring voltage drop: 200mV
Max. input current: 20A (less than 10s)
Overload protection: 0.2A / 250V self-resume fused, 20A range infused
Frequency response: 40…200Hz;
Displaying: rms of sine wave (mean value response)
|
Function
|
Range
|
Resolution
|
Accuracy
|
|
Resistance
|
200Ω
|
0.1Ω
|
±(0.8%+5)
|
|
2kΩ
|
1Ω
|
±(0.8%+3)
|
|
20kΩ
|
10Ω
|
±(0.8%+3)
|
|
200kΩ
|
100Ω
|
±(0.8%+3)
|
|
2MΩ
|
1kΩ
|
±(0.8%+3)
|
|
20MΩ
|
10kΩ
|
±(1%+15)
|
|
200MΩ
|
100kΩ
|
±(5%+30)
|
Open voltage: less than 3V
Overload protection: 250VDC or AC peak value
NOTE: At 200Ω range, it should make the test leads short to measure the wire resistance, then, subtracts from the real measurement.
At 200 MΩ range, make the test leads short, LCD displays 1.0MΩ, it’s normal and has no effect on the accuracy and should be subtracted from real measurement.
|
Function
|
Range
|
Resolution
|
Accuracy
|
|
Capacitance
|
20nF
|
10pF
|
±(2.5%+20)
|
|
200nF
|
100pF
|
±(2.5%+20)
|
|
2μF
|
1nF
|
±(2.5%+20)
|
|
200μF
|
100nF
|
±(5.0%+10)
|
- Power: one 9V battery (NEDA1604/6F22 or equivalent)
- Dimensions: 190x93.5x37mm / 7.5x3.7x1.5in
- Weight: 426g / 15oz
Accessories
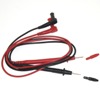
1. Red and Black Test leads

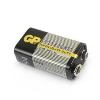
2. 9V battery (design may vary)

3. Instruction Manual

| AM-1009 Digital Multimeter - front view |
|
|
Transistor hFE Test
- Set the knob to hFE range. Insert the test accessory to COM and mA terminal, and the anode is corresponding to COM and cathode is corresponding to mA terminal.
- Verify the transistor under tested is NPN or PNP, insert emitter, base and collector to proper jack.
AC Current Measurement
- Apply the black test lead to "COM" terminal and the red one to "mA" terminal (max. 200mA),or apply the red one to "20A" terminal (max. 20A).
- Set the knob to proper ACA range, connect the meter to the circuit under tested.
NOTE:
- If the current under tested is unknown beforehand, set the knob to the highest range, then, select proper range according to the displaying value.
- If LCD displays "1", it means over range, should set the knob to a higher range.
- Max. input current is 200mA or 20A (subject to where the red test lead apply to), too large current will blow the fuse. Be careful at 20A, because 20A is infused, continuously measuring will make the circuit heat and effect on the accuracy even damaged the meter.
AC Voltage Measurement
- Apply the black test lead to "COM" terminal and the red one to V/Ω/Hz terminal.
- Set the knob to proper ACV range, connect the test leads crossly to the circuit under tested.
NOTE:
- If the voltage under tested is unknown beforehand, set the knob to the highest range, then, select a proper range according to the displaying value.
- There is a remained value at small voltage range before measuring, it is normal and have no effect on measurement. If MSD displays "1" , it means over range, should set the knob to a higher range.
- Do not input voltage over 750Vrms, or, the circuit might be damaged.
- Be careful when measuring high volt circuit.
Capacitance Measurement
- Set the knob to proper capacitance range, and insert the test accessory to "COM" and "mA" terminal. Be aware of that "COM" terminal corresponds to anode and connects with red test lead, and "mA" terminal corresponds to cathode and connects with black test lead.
- Connect test leads to the two points of capacitor, be ware of polarity if necessary.
NOTE:
- If the capacitance under tested is over the max. value of selected range, LCD displays "1" only, thus, should set the knob to a higher range.
- It’s normal that there is a remained value on LCD before capacitance measurement, and it has no effect on measuring.
- When measuring at large capacitance range, if capacitor is broken or leakage, LCD displays a value and it’s unstable.
- Release the capacitor completely before measuring.
DC Current Measurement
- Apply the black test lead to "COM" terminal, and the red one to mA terminal (max. 200mA), or red test lead to "20A" terminal (max. 20A).
- Set the knob to proper DCA range, connect the meter to the circuit under tested, the current value and polarity of red test lead connect to will display on LCD.
NOTE:
- If the current under tested is unknown beforehand, set the knob to the highest range, then, select proper range according to the displaying value.
- If LCD displays "1", it means over range, should set the knob to a higher range.
- Max. input current is 200mA or 20A (subject to where the red test lead apply to), too large current will blow the fuse. Be careful at 20A, because 20A is infused, continuously measuring will make the circuit heat and effect on the accuracy even damaged the meter.
DC Voltage Measurement
- Apply the black test lead to “COM” terminal and the red one to V/Ω/Hz terminal.
- Set the knob to a proper DCV range, connect the black test lead crossly to the circuit under tested, the voltage and polarity of the point which the red lead connect to will display on LCD.
NOTE:
- If the voltage range is unknown beforehand, set the knob to the highest range, then, select a proper range according to the displaying value.
- There is a remained value at small voltage range before measuring, it is normal and have no effect on measurement. If MSD displays "1", it means over range, should set the knob to a higher range.
- Do not input a voltage over 1000V, or, the circuit might be damaged.
- Be careful when measuring high voltage circuit.
Diode/Continuity Measurement
- Apply the black test lead to "COM" terminal and the red one to V/Ω/Hz terminal (the polarity of red lead is "+").
- Set the knob
  to range, connect test leads to the diode under tested, the red test lead connects to diode positive polarity, the reading is the approx. value of diode forward volt drop. to range, connect test leads to the diode under tested, the red test lead connects to diode positive polarity, the reading is the approx. value of diode forward volt drop.
Apply test leads to two points of tested circuit, if the inner buzzer sounds, the resistance is less than (70±20)Ω.
Live wire verify
- Remove black test lead from "COM" terminal, insert red lead to "V/Ω/Hz" terminal.
- Set the range knob to TEST range, apply red lead to the circuit under tested.
- If LCD displays "1", and alarms with sound and light, it means that the circuit under tested is live wire; if LCD doesn’t display "1" and doesn’t alarm, it means the circuit under tested is "0" wire.
NOTE:
- The function is only for testing AC standard live wire (110VAC … 380VAC).
- Must be operated under safety rules.
Resistance Measurement
- Apply the black test lead to "COM" terminal and the red one to V/Ω/Hz terminal.
- Set the knob to proper resistance range; connect test leads crossly to the resistor under tested.
NOTE:
- If resistance is over selected range value, "1" displays, should set the knob to a higher range. When measuring value is over 1MΩ, the reading will take a few seconds to be stable, it’s normal for high resistance measuring.
- When input terminal is in open circuit, overload displays.
- When measuring in line resistor, be sure that power is turned off and all capacitors are released completely
- Do not input any volt at this range.
NOTE:
- At 200Ω range, it should make the test leads short to measure the wire resistance, then, subtracts from the real measurement.
- At 200MΩ range, make the test leads short, LCD displays 1.0MΩ, it’s normal and has no effect on the accuracy and should be subtracted from real measurement.
Frequently Asked Questions
Does AKTAKOM AM-1009 multimeter have auto power off function?
How can I deactivate Auto Power Off function of AKTAKOM AM-1009 multimeter?
| Does AKTAKOM AM-1009 multimeter have auto power off function? |
|
Yes, it does. There is Auto Power Off function in AM-1009: the device power automatically goes off if you do not use the device within 15 minutes. One minute before the device is powered off it will make 4 sound signals, and right before the powering off – one more long signal. To start the operation again after Auto Power Off you need to press any button.
Up
|
| How can I deactivate Auto Power Off function of AKTAKOM AM-1009 multimeter? |
|
To deactivate Auto Power Off function you need to press POWER/APO button once, at the same time “APO” will disappear from the display. To activate Auto Power Off function press POWER/APO button again.
Up
|
Back to the section
|
|


